20 Easy Indoor Halloween Decorations You Can Make on a Budget
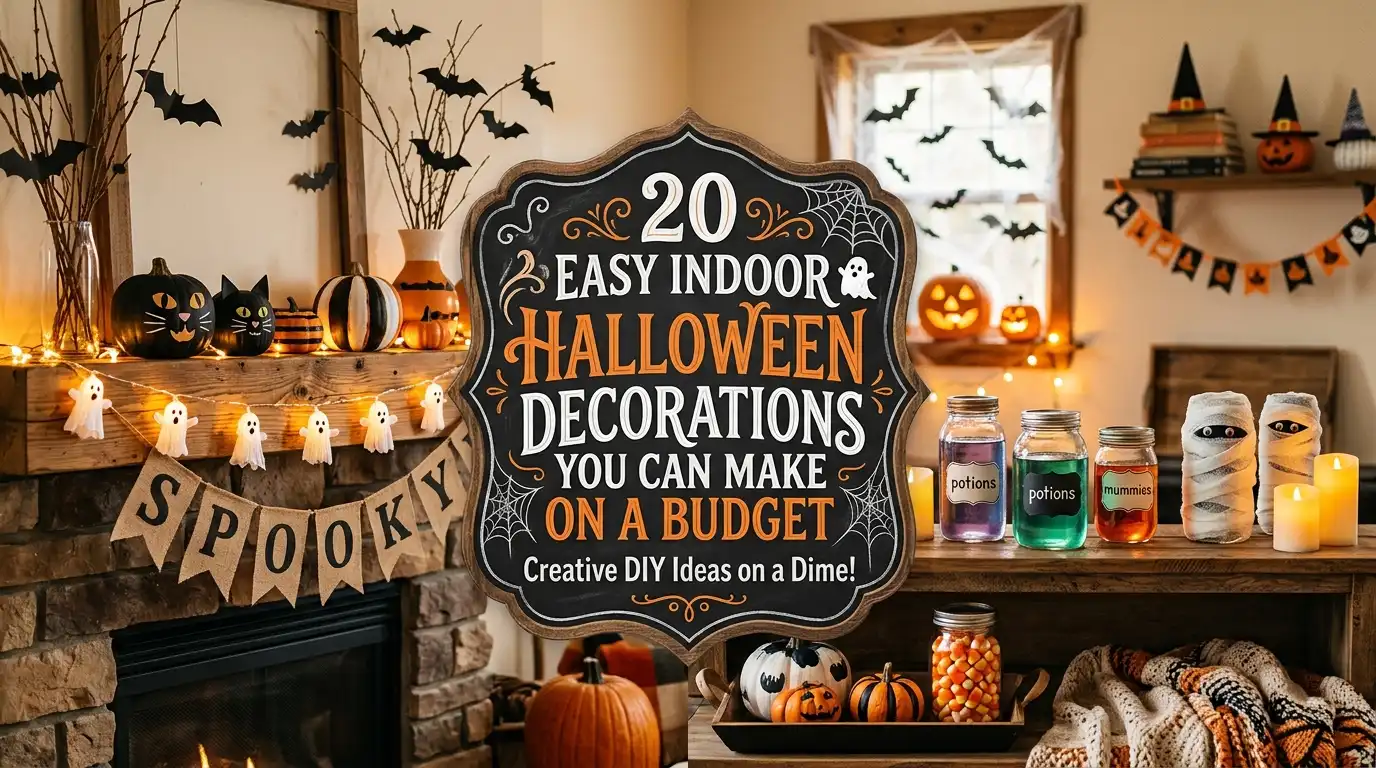
Easy indoor Halloween decorations can make your home feel festive and a little spooky without spending much money. You don’t need expensive store-bought props or a complete room makeover to create a memorable Halloween atmosphere. A few inexpensive craft supplies, everyday household items, and creative touches can turn an ordinary living room, entryway, kitchen, or mantel into a seasonal display.
The best part about decorating on a budget is that many projects are simple enough to make in an afternoon. Paper bats, glowing mason jars, homemade ghosts, and painted pumpkins can all add personality to your space without requiring advanced crafting skills. You can also reuse decorations from previous years and adapt each project to suit your home’s existing colors and style.
Here are 20 creative indoor Halloween decorating ideas, with practical tips to help you recreate each look affordably.
Create a Spooky Paper Bat Wall

Paper bats are one of the easiest ways to decorate a room for Halloween because they require very few materials but create a noticeable visual effect. Arrange a cluster of black bats above a sofa, around a doorway, or across a hallway wall to make it look as though they’re flying through your home.
Use black construction paper or cardstock left over from other craft projects. Draw a simple bat silhouette, cut it out, and use it as a template for the remaining shapes. Make bats in several sizes so the display looks more natural.
How to create the look:
- Cut 15–25 bat shapes from black paper, adjusting the quantity to suit your wall.
- Fold the wings slightly to give each bat a little dimension.
- Attach them using removable wall-safe adhesive suitable for your paint finish.
- Arrange the bats in a flowing pattern, with smaller shapes appearing farther away.
Budget tip: Use printer paper for a temporary display, or save the cardstock bats in an envelope for next Halloween.
Turn Mason Jars Into Glowing Halloween Lanterns

Empty glass jars can become charming Halloween lanterns with only a few inexpensive supplies. Their warm glow looks lovely on a mantel, windowsill, bookshelf, or dining table, especially when the rest of the room has soft lighting.
Clean and dry your jars, then cover the outside with orange tissue paper using a suitable craft adhesive. Cut simple black shapes for eyes, noses, and grinning mouths, and attach them to create jack-o’-lantern faces. For a ghost-inspired variation, use white tissue paper and black facial details.
Place a battery-operated tea light inside each jar. Using battery-powered lights avoids the open-flame risk associated with real candles inside decorated containers.
Materials to gather:
- Empty mason jars or clean glass food jars
- Orange or white tissue paper
- Black paper
- Craft glue
- Battery-operated tea lights
Group three jars of different heights together for a fuller display without buying extra decorations.
Make Friendly Ghosts From White Fabric

Homemade fabric ghosts add a playful Halloween touch without making your home feel overly dark. They’re especially useful if you prefer decorations that look whimsical rather than frightening.
Use scraps of white fabric, an old white sheet, or inexpensive cheesecloth. Drape the fabric over a lightweight support to create a rounded head and flowing body. Add small black paper eyes if you’d like a recognizable ghost face.
Hang the finished ghosts at different heights near an entryway, from a suitable indoor display stand, or above a decorative table. You can also make miniature versions to place on shelves.
Quick Tip: Keep fabric ghosts away from candles, heaters, and hot light bulbs. For a hanging display, secure each one properly and avoid blocking walkways or doorways.
Decorate Mini Pumpkins With Budget-Friendly Paint

Painted mini pumpkins are an easy alternative to elaborate carved decorations. They work well on coffee tables, shelves, mantels, and kitchen counters, and you can tailor the designs to your existing decor.
Start with inexpensive mini pumpkins, either real or artificial. Use craft paint to create simple stripes, polka dots, checkerboard patterns, or classic black-and-white faces. A few matte black pumpkins mixed with traditional orange ones can create a coordinated display without requiring many supplies.
For a softer look, try cream-colored pumpkins with tiny black stars. If you enjoy a more playful style, paint exaggerated eyes and crooked smiles on orange pumpkins.
Do: Test the paint on a small area first, particularly on artificial pumpkins with a slick finish.
Don’t: Stack delicate painted pumpkins before the paint has dried completely.
Hang a DIY Halloween Garland
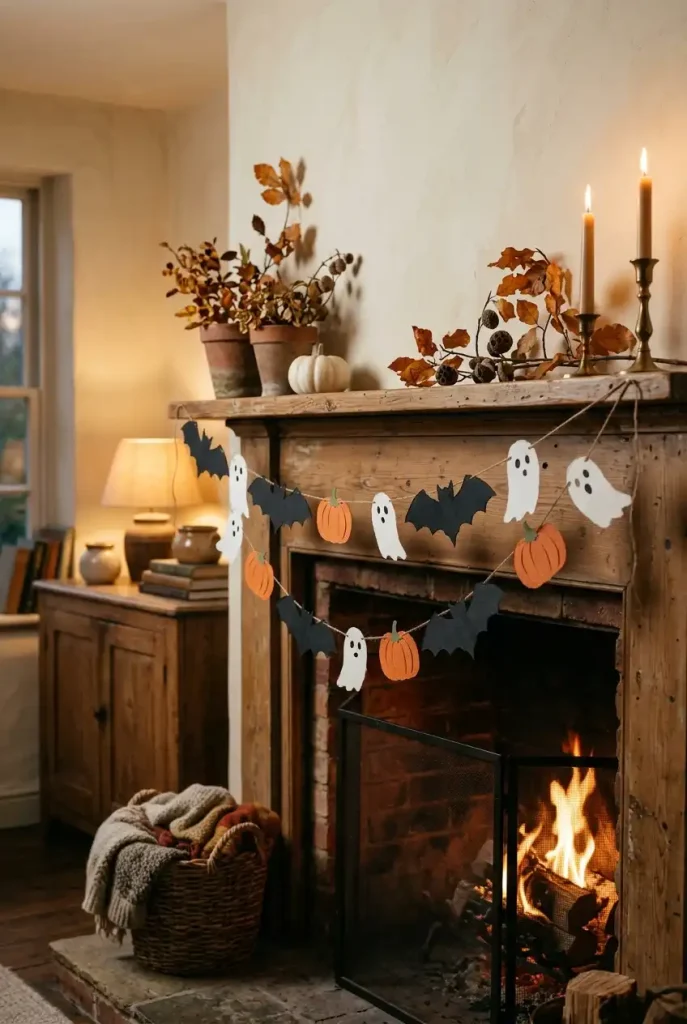
A homemade garland is an inexpensive way to decorate a mantel, window, bookshelf, or doorway. Unlike large Halloween props, it uses very little space and can be made to fit the exact length you need.
Cut paper into triangles, circles, pumpkins, ghosts, or alternating black-and-orange shapes. Thread the pieces onto string or ribbon, leaving enough room between them so the individual designs remain visible. If you have leftover felt, you can use it to make a sturdier version that can be stored and reused.
For a coordinated look, repeat the same two or three colors throughout the garland instead of mixing every shade.
Easy variations:
- Black bats against an orange paper background
- White ghosts on black string
- Alternating orange pumpkins and cream circles
- Black-and-white pennants with small orange accents
Use removable hooks or suitable clips to hang the finished decoration without unnecessarily damaging walls.
Create a Halloween Bookshelf Display
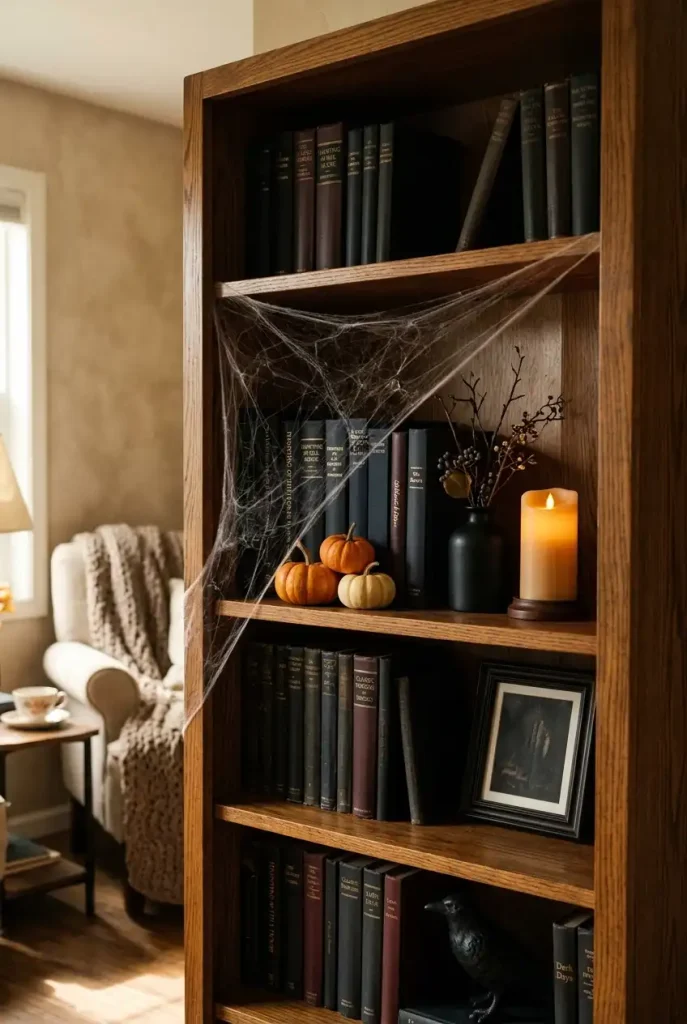
You don’t need to decorate every corner of your home to create a Halloween atmosphere. A single bookshelf can become a seasonal focal point with a few small, carefully chosen objects.
Start by rearranging books you already own. Turn a few dark-covered books outward, stack two or three horizontally, and leave some open space for small pumpkins, paper bats, or miniature skeleton decorations. A small battery-powered candle can add a soft glow to an otherwise ordinary shelf.
If you want a slightly eerie appearance, place a few old-looking books beside a small black vase or a faux spiderweb. Keep the display balanced so the shelves remain functional.
Budget tip: Shop your home before purchasing anything. Black picture frames, dark book covers, spare jars, and small bowls can all contribute to the display.
Style a Spooky Halloween Coffee Table

Your coffee table is an ideal place for a small Halloween arrangement because it’s visible without taking up wall space or requiring a permanent decorating change.
Use a tray you already own as the foundation. Add a few miniature pumpkins, a black bowl, a small faux skull, and a battery-operated candle. A folded black or burnt-orange cloth underneath the arrangement can make inexpensive objects feel more connected.
The secret is keeping the display compact. Leave enough room for drinks, books, and everyday use, particularly if your living room is small.
For a more understated approach, choose white pumpkins, natural wood, and one or two black accents. For a more theatrical result, use darker objects and add a little faux cobwebbing around the tray.
Make Spiderweb Decorations With Cotton or Yarn

Spiderwebs create a recognizable Halloween look, and a handmade version can cost very little. Instead of covering the whole room with synthetic webbing, create one intentional display in a corner, around a decorative frame, or above a console table.
For a simple yarn web, arrange several strands as spokes and connect them with smaller pieces of yarn to form an irregular web pattern. White yarn stands out against a dark wall or black backing board, while black yarn can look striking against a light background.
Add one or two lightweight decorative spiders to complete the effect. Avoid placing webs where they might catch on lamps, electronics, or frequently used door handles.
Common Mistake: Making the web too dense can hide the shape. Leave some open space between strands so the pattern remains clear.
Arrange a Mini Halloween Potion Station

A miniature potion station brings a playful haunted-house atmosphere to a shelf or side table. It can be created almost entirely from recycled containers, making it a good choice for anyone decorating on a tight budget.
Collect clean glass bottles, small jars, and empty spice containers. Arrange them in groups of different heights and fill them with harmless decorative materials such as colored paper, dry leaves, or decorative beads. Add corks where appropriate and use removable paper labels if you want a vintage apothecary appearance.
For a polished display, stick to a small palette: amber, green, black, and clear glass work particularly well together.
Important: Keep decorative bottles clearly separate from food and drinks. Don’t use real chemicals or unidentified liquids as props, and keep small decorative items out of reach of young children and pets.
Decorate Windows With Paper Silhouettes

Windows offer a useful decorating surface that doesn’t require extra furniture or shelf space. Black paper silhouettes can turn a plain window into a simple Halloween scene, especially when viewed from inside against the evening sky.
Cut out shapes such as crooked trees, bats, a crescent moon, a haunted house, or a row of tiny cats. Attach them to the glass using an appropriate removable material, checking that it won’t leave residue or damage any window film.
If you prefer a cleaner style, use just a few large silhouettes rather than filling the entire window. Keep the central viewing area clear if you want to preserve the natural light and outdoor view.
Quick Tip: Arrange the silhouettes on a table first, then transfer the final composition to the window. This makes it easier to check spacing before attaching anything.
Make a Floating Witch Hat Display
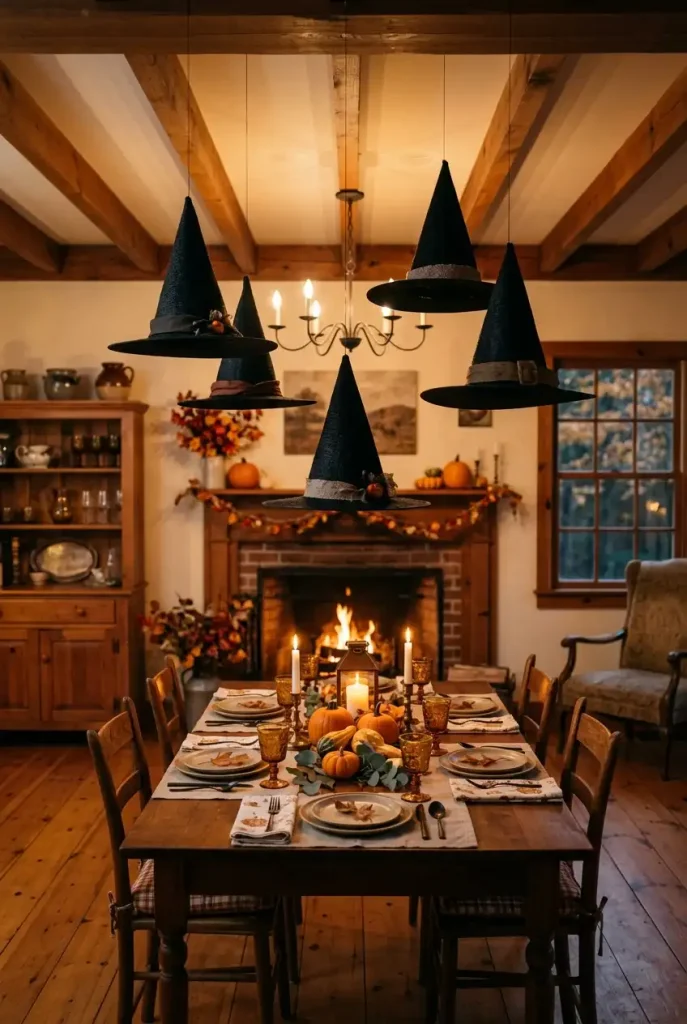
A collection of floating witch hats creates a dramatic Halloween feature without taking up any floor space. It’s particularly effective in an entryway, above a dining table, or in a room with enough ceiling clearance.
Use inexpensive black witch hats from a seasonal discount store. Attach lightweight, transparent hanging line to each hat and secure the line to suitable ceiling hooks. Vary the hanging heights to create movement and visual depth.
For a more colorful version, add small orange ribbons or purple fabric bands around the hats. You can also hang one or two lightweight paper bats between them to connect the display.
Practical consideration: Use ceiling-safe mounting hardware appropriate for your surface, and keep the hats clear of ceiling fans, lights, sprinklers, and walkways.
Build a Halloween Shadow Box
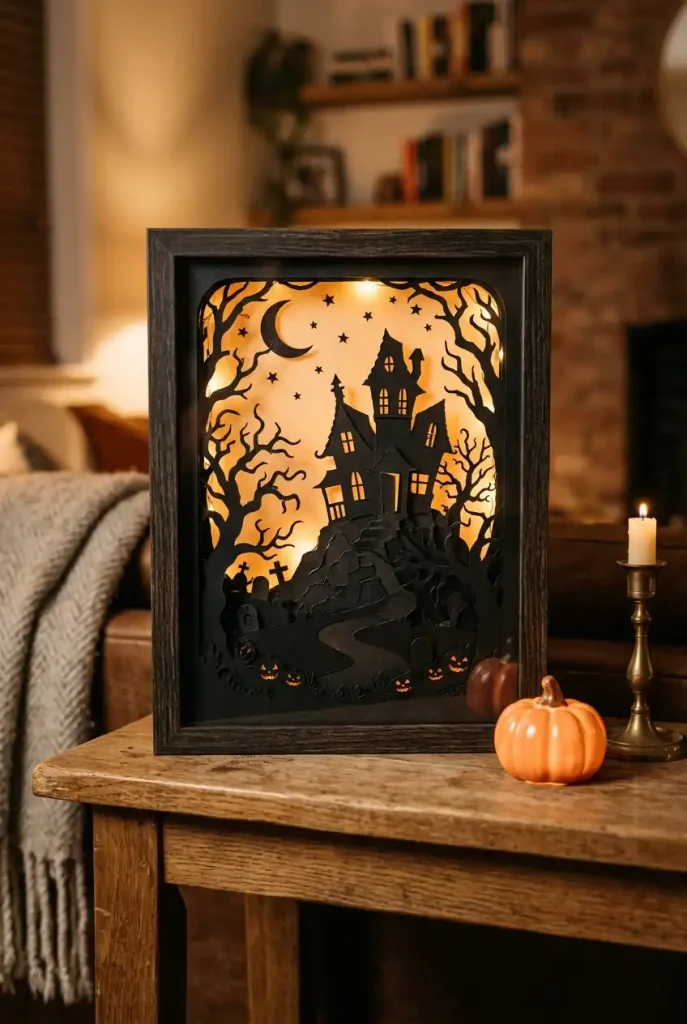
A shadow box is a small framed scene made from layered paper or lightweight craft materials. It looks detailed and artistic, but you can create one using an inexpensive frame, colored paper, and basic cutting tools.
Choose a theme before you begin. A haunted house, a graveyard beneath a crescent moon, or black cats sitting among pumpkins all work well. Cut the background and foreground elements separately, then attach them at slightly different depths using small pieces of foam tape.
The layers create shadows that make the scene feel three-dimensional. A deep frame helps, but a regular frame can also work if you keep the design relatively flat.
Materials: An old picture frame, black and orange paper, scissors or a craft knife, adhesive, and optional foam mounting tape.
If children are helping, have an adult handle sharp cutting tools.
Turn an Empty Corner Into a Mini Haunted Scene

You can create a memorable Halloween display in an unused corner without buying large decorations. The key is to combine a few objects of different heights instead of filling the area with random props.
Start with a small side table or an existing plant stand. Add a vase containing bare decorative branches, two or three pumpkins, and a battery-powered lantern. A piece of dark fabric beneath the display can visually anchor the arrangement.
For a friendly Halloween style, choose orange pumpkins and warm lights. If you prefer a haunted-house atmosphere, use black branches, cream pumpkins, and a little faux cobwebbing.
Editor’s Note: Keep the tallest elements toward the back and the smaller pieces toward the front. This creates depth and makes a compact display easier to appreciate from across the room.
Create a Spooky Mirror Display

An ordinary mirror can become part of your Halloween decor without needing paint or permanent alterations. Its reflective surface adds depth, while a few lightweight decorations make it feel seasonal.
For a simple design, arrange paper bats around the outer frame. Alternatively, drape a little faux cobwebbing across one corner or add removable black paper silhouettes along the bottom edge.
An ornate secondhand mirror can give the display a vintage haunted-house feeling. A plain modern mirror works just as well if you prefer a more minimal look.
Use removable decorations that are suitable for the mirror’s finish, and avoid covering too much reflective surface. The goal is to frame the mirror, not hide it.
Style a Budget Halloween Mantel
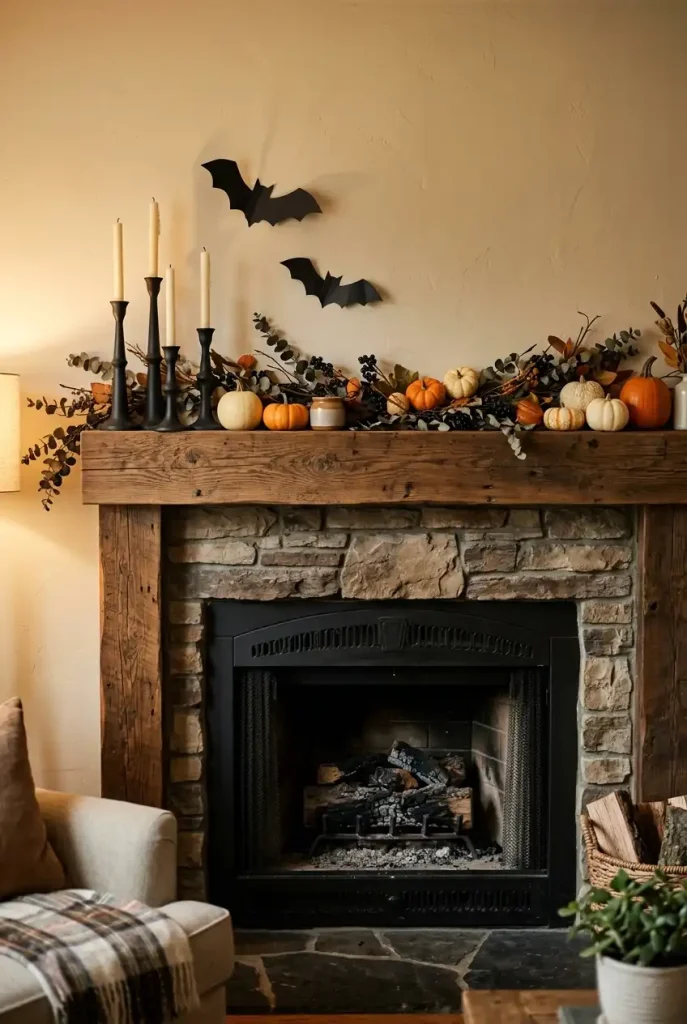
A mantel can become the main Halloween focal point with a combination of inexpensive pumpkins, paper decorations, and objects you already own. You don’t need a matching store-bought collection to create a coordinated result.
Begin with a simple garland or a few strands of decorative branches. Add pumpkins in different sizes, then balance the arrangement with small framed pictures, black candleholders, or handmade ghosts.
Try this arrangement method:
- Place the largest pumpkins or decorative objects first.
- Add medium-sized pieces to create balance on both sides.
- Fill only a few gaps with smaller accents.
- Step back and remove anything that makes the display feel crowded.
If your home doesn’t have a fireplace, use the same styling approach on a console table or floating shelf.
Safety note: Keep paper garlands, dried branches, fabric, and other flammable decorations away from an operating fireplace and hot surfaces.
Fill a Glass Bowl With Halloween Treats
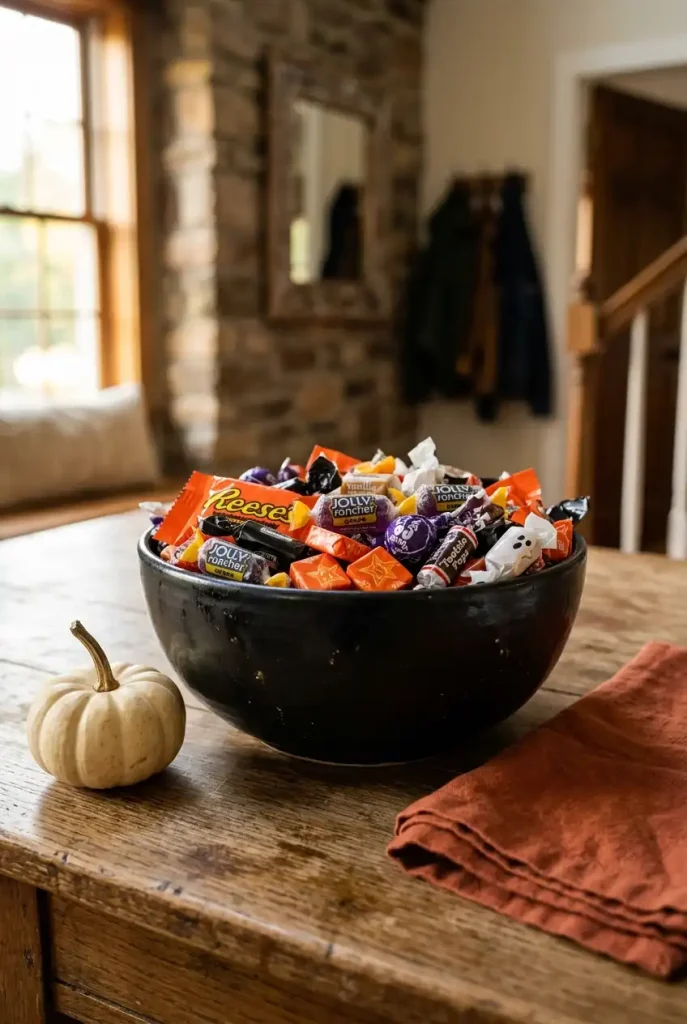
A decorative treat bowl is both useful and festive, making it a practical choice for family gatherings or Halloween visitors. It also works as a small accent on a kitchen counter, entryway console, or side table.
Use a glass bowl, ceramic dish, or container you already own. Fill it with individually wrapped Halloween candy in a mixture of orange, black, purple, and white packaging. For a more decorative arrangement, place a small black napkin beneath the bowl or add a few miniature pumpkins nearby.
If you don’t want to display edible treats, fill the bowl with lightweight paper bats, decorative pom-poms, or faux miniature pumpkins instead.
Quick Tip: Keep food covered or wrapped when necessary, especially if the bowl is displayed near pets or in an area where dust can collect.
Make a Halloween Wreath From Paper or Fabric Scraps
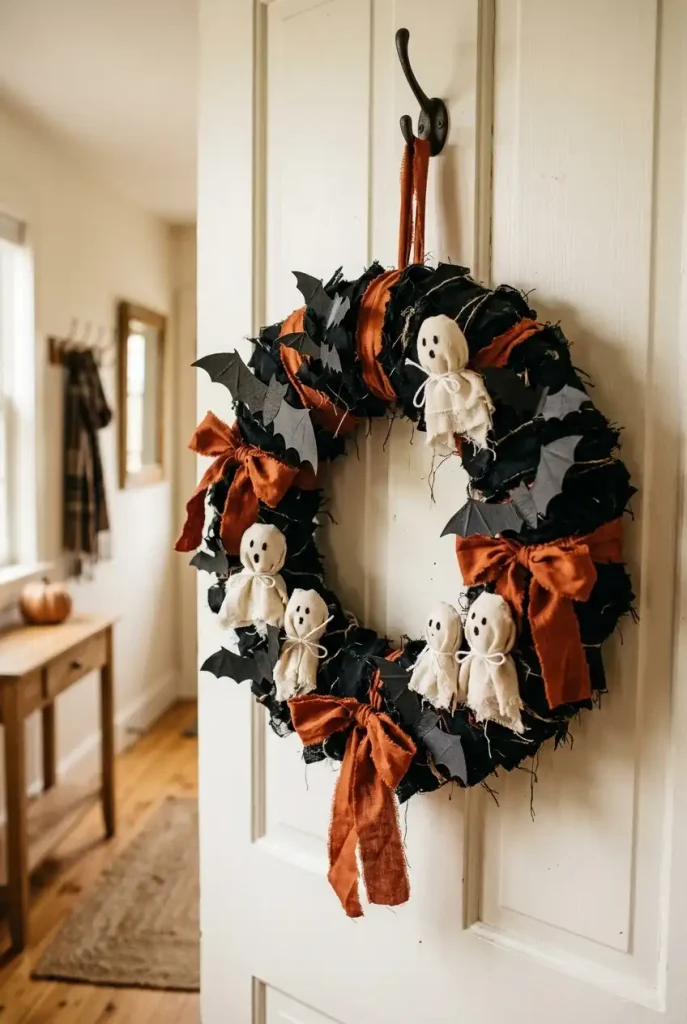
A handmade wreath brings Halloween style to an interior door, hallway wall, or the space above a console. A simple base can be made from cardboard, leftover ribbon, or a secondhand wreath that needs a seasonal refresh.
Cut a ring from sturdy cardboard and wrap it with black fabric strips, orange ribbon, or strips of old material. Add paper bats, tiny fabric ghosts, or small artificial leaves to create a focal point.
For a softer, more neutral version, use cream fabric, black ribbon, and just one or two orange accents. For a classic Halloween look, combine black and bright orange.
Keep the wreath lightweight if you plan to hang it on a door using removable hardware.
Create a Black-and-Orange Table Runner
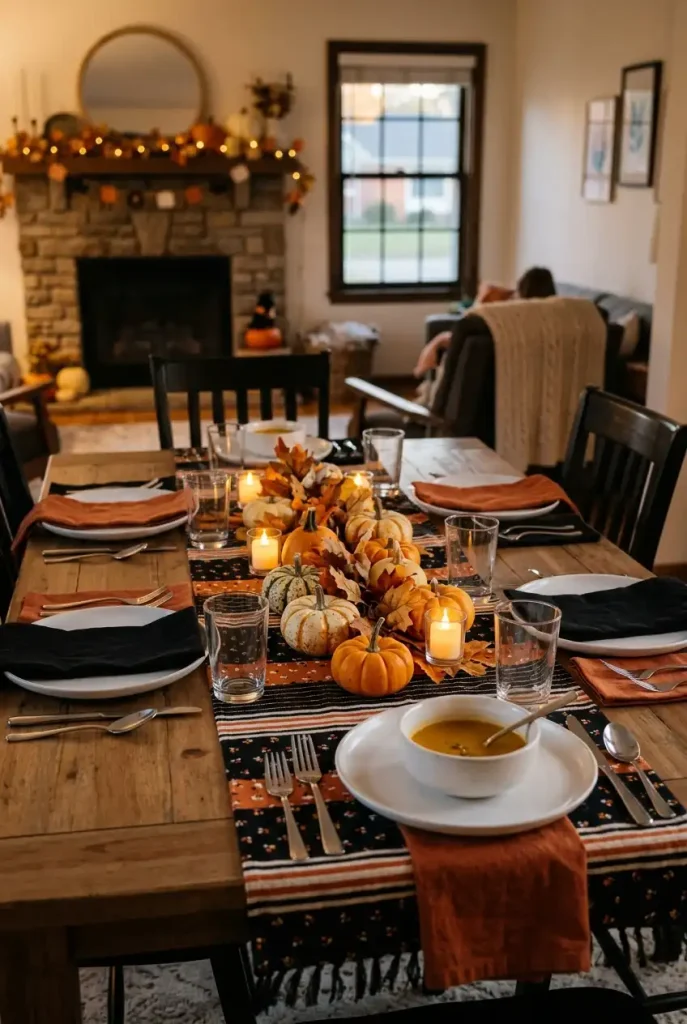
You can give a dining table or kitchen island a Halloween makeover without purchasing new tableware. A simple fabric runner introduces seasonal color while leaving most of the tabletop available for meals and everyday activities.
Use an existing black runner and add an orange strip of fabric down the center. Alternatively, arrange alternating black-and-orange fabric pieces if you enjoy sewing. For a no-sew option, choose fabric with finished edges or use a suitable fabric adhesive according to its instructions.
Complete the look with a few small pumpkins, simple place settings, and battery-operated tea lights. Keep the centerpiece low enough that people can see one another across the table.
Do: Choose washable or easily stored materials if the table will be used for family meals.
Don’t: Let loose fabric hang near open flames or hot serving dishes.
Make a Spooky Picture Frame Gallery
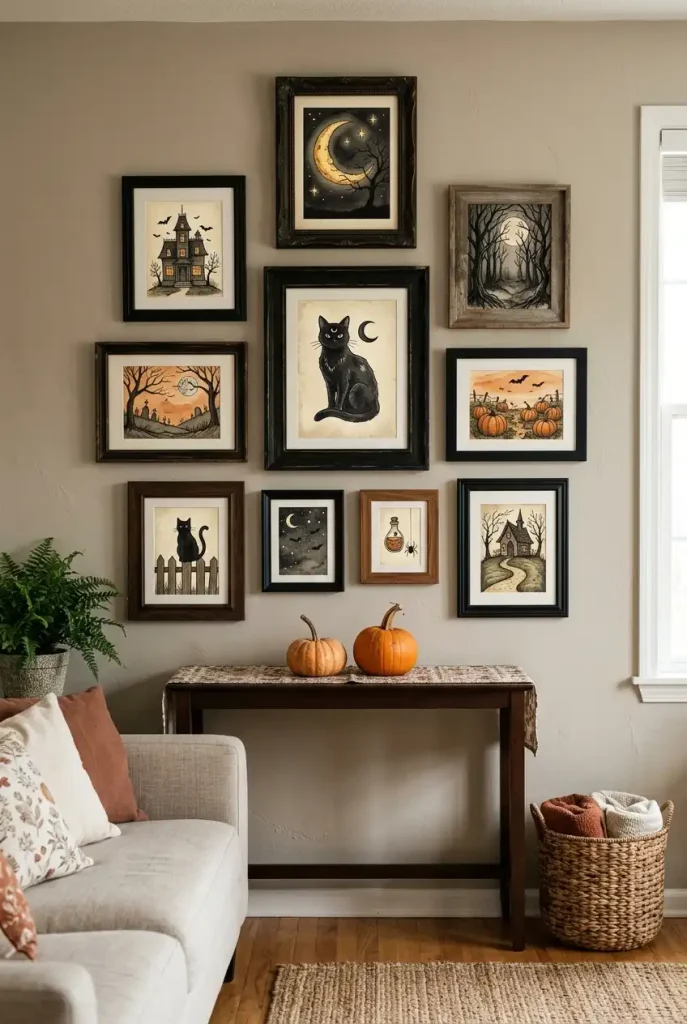
A Halloween gallery wall lets you decorate with inexpensive prints instead of buying large seasonal signs. It works especially well in a hallway, above a small console, or on a wall that already holds picture frames.
Reuse frames from around the house, or look for inexpensive secondhand options. Fill them with original Halloween illustrations, black cat silhouettes, moon phases, haunted-house drawings, or vintage-inspired botanical prints.
For a coordinated display, keep the artwork within a limited color palette of black, cream, and muted orange. Vary the frame sizes slightly, but maintain enough alignment to make the arrangement look intentional.
If you rent your home, consider a smaller gallery that can be hung with appropriate removable picture-hanging products.
Arrange a Cozy Halloween Candlelight Display
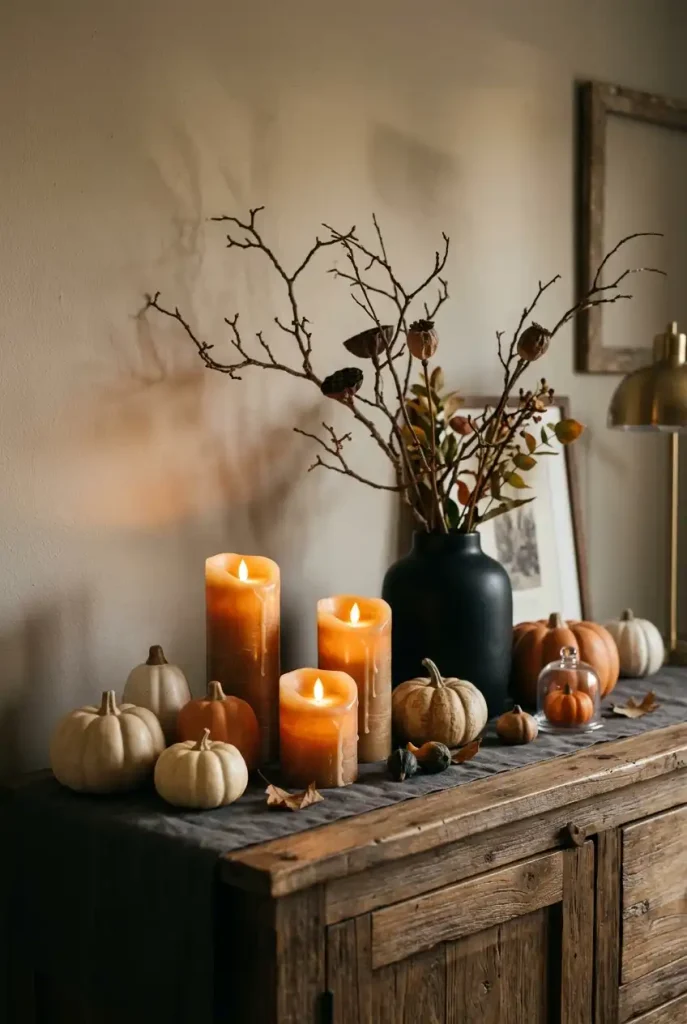
Soft lighting can make even a simple Halloween arrangement feel atmospheric. Instead of purchasing expensive illuminated props, group a few battery-operated candles with miniature pumpkins and dark decorative accents.
Choose candles in different heights and place them on a stable tray or a heat-safe decorative surface. Add cream pumpkins for contrast, or use traditional orange pumpkins for a more colorful seasonal display. A black vase or a few decorative branches can complete the arrangement.
This idea works well on a bookshelf, sideboard, bedroom dresser, or coffee table. It can also complement the other decorations throughout your home without competing with them.
For a warm, inviting result, use a few carefully arranged objects rather than covering every available surface.
Safety tip: Battery-operated candles are a practical alternative around paper bats, fabric ghosts, garlands, and other flammable decorations. Keep all lights and decorative objects away from children and pets where appropriate.
How to Decorate for Halloween Without Overspending
You can create a coordinated Halloween look without buying all 20 decorations. Choose a few projects that work together and build from supplies you already have.
| Decorating goal | Affordable options |
|---|---|
| Decorate empty walls | Paper bats, silhouettes, framed prints |
| Add a warm glow | Mason jar lanterns, battery candles |
| Create a seasonal focal point | Mantel styling, coffee table tray |
| Make use of unused corners | Potion bottles, branches, pumpkins |
| Decorate for guests | Candy bowl, table runner, wreath |
| Add a playful touch | Fabric ghosts, floating witch hats |
Three ways to save more
- Reuse household materials. Glass jars, cardboard, old fabric, spare frames, and paper scraps can become Halloween decorations.
- Choose a consistent color palette. Black, orange, and cream are easy to coordinate and help inexpensive projects look intentional.
- Store reusable pieces carefully. Keep paper crafts flat, wrap fragile items, and label a storage box so you can use the decorations again next year.