
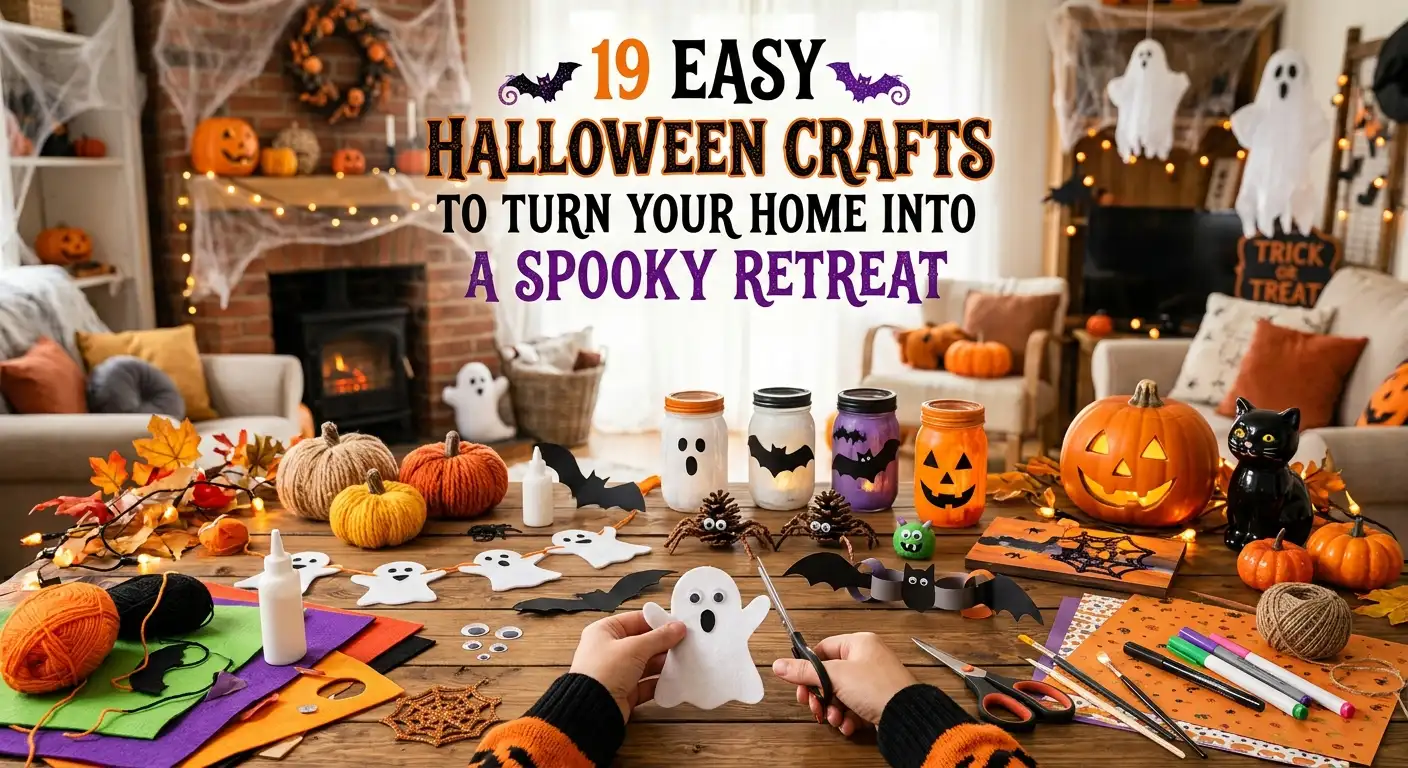
19 Easy Halloween Crafts to Turn Your Home Into a Spooky Retreat
Halloween decorating doesn’t have to mean filling every room with expensive store-bought decorations. A few handmade details can give your home a much more personal, collected feel—and many of them can be made with basic craft supplies, thrift-store finds, recycled containers, and things you already have around the house.
These easy Halloween crafts range from subtle autumn accents to genuinely spooky pieces that make a hallway, porch, mantel, dining table, or entryway feel ready for October. Some take only a few minutes, while others are ideal for a relaxed weekend crafting session.
The key is to choose a visual direction before you start. Black and ivory can create a sophisticated haunted-house look, while orange, amber, and warm wood feel more traditional. For a darker retreat, layer shadows, aged textures, candlelight, and silhouettes rather than relying on plastic decorations alone.
Create a Black Paper Bat Wall

A swarm of paper bats is one of the easiest ways to make a blank wall feel dramatically different for Halloween. The trick is to avoid arranging every bat in a perfectly straight line. Instead, begin with a loose cluster near a doorway, mantel, staircase, or piece of artwork and gradually spread the shapes outward.
Use black cardstock for a crisp silhouette, or choose slightly textured black paper for a softer handmade appearance. Create several sizes so the swarm has depth and movement.
Materials
- Black cardstock
- Scissors
- Pencil
- Bat template or simple hand-drawn bat shapes
- Removable adhesive
How to Make It
- Fold a sheet of cardstock in half and sketch half of a bat along the fold.
- Cut out the shape and unfold it to create a symmetrical bat.
- Repeat with several different sizes.
- Slightly bend the wings upward on some bats.
- Arrange them in a rising or swirling pattern.
- Attach them with removable adhesive suitable for your wall surface.
Quick Tip: Keep a few bats smaller and farther apart as the swarm moves away from the main cluster. That small change makes the installation look more natural.
Turn Glass Jars Into Haunted Lanterns

Empty glass jars can become atmospheric Halloween lanterns with very little effort. Rather than trying to make them perfectly polished, embrace the slightly imperfect handmade look.
Wrap the outside with gauze for a mummy-inspired version, paint a simple black silhouette on the glass, or add translucent tissue paper behind cutout shapes. Place battery-operated LED tea lights inside instead of open flames, particularly when the jars will sit near curtains, paper decorations, or other flammable materials.
For a cohesive display, group three or five jars at different heights on a mantel, console, or porch table.
Best For: Mantels, entry tables, covered porches, and Halloween party displays.
Make a Dried-Flower Halloween Wreath
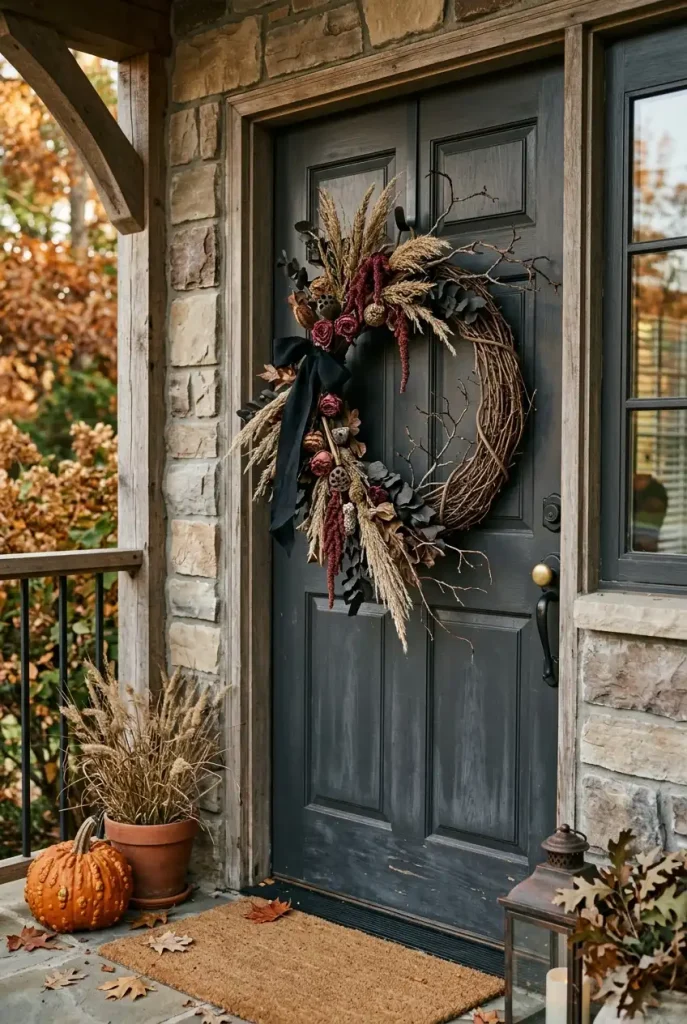
A Halloween wreath doesn’t have to be bright orange. A darker arrangement of dried grasses, branches, preserved leaves, and deep-toned florals can create an understated autumn entrance.
Start with a plain grapevine wreath or another natural base. Add dried stems asymmetrically rather than covering the entire circle. Finish with a black ribbon or a small handmade paper accent.
This approach works especially well if you want Halloween decorations that can transition naturally into late-fall décor.
Tips & Tricks
- Keep one section of the wreath relatively open.
- Combine different textures instead of relying on one type of foliage.
- Use matte black ribbon for a more modern finish.
- Secure lightweight stems with floral wire.
- Hang the wreath where the door surface won’t be damaged by the attachment method.
Craft a Mini Haunted-House Village

A small haunted-house village can become the centerpiece of a mantel, bookshelf, or dining-room sideboard. The project is especially flexible because the buildings don’t need to be architecturally perfect.
Use lightweight cardboard or small plain craft boxes as the building forms. Paint them matte black, charcoal, cream, or muted gray, then add tiny windows and roof details with cardstock.
For a more sophisticated display, vary the building heights and leave plenty of breathing room between them.
How to Make It
- Cut simple house silhouettes from sturdy cardboard.
- Fold or assemble the pieces into small three-dimensional structures.
- Add windows, doors, rooflines, and chimneys from paper or thin cardboard.
- Paint the houses in a restrained palette.
- Arrange them on a wooden tray or shelf.
- Add a few small branches or artificial moss around the bases.
Common Mistake: Making every building the same height and shape.
Better Approach: Create a village with one or two taller focal houses, several smaller buildings, and open spaces between them.
Make Floating Witch Hats for the Porch
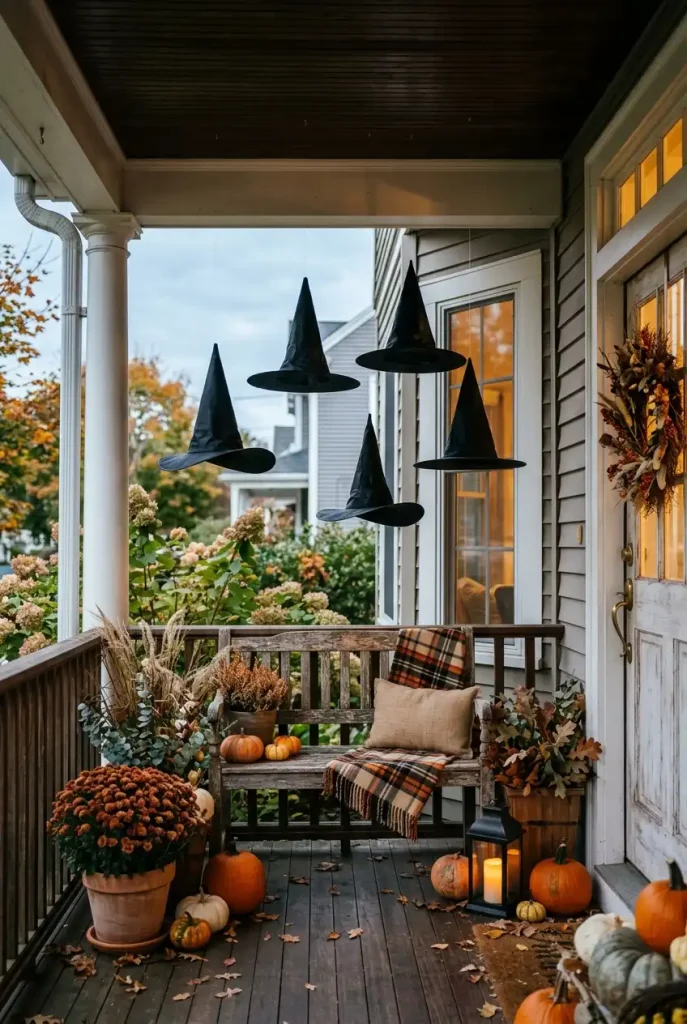
A cluster of suspended witch hats can make an ordinary porch feel playful and slightly mysterious. The visual effect comes from the hats appearing to float in midair.
Use lightweight inexpensive witch hats and transparent hanging line. Suspend them at different heights near a covered porch ceiling, entryway, or sheltered outdoor area.
Keep the arrangement relatively simple so the hats remain the focal point.
Safety Note: Secure hanging decorations properly and keep them clear of walkways, doors, lighting fixtures, and anything that could snag them. Outdoor materials should also be appropriate for the conditions where they will be displayed.
Turn Cardboard Boxes Into Faux Tombstones

A few handmade tombstones can transform a porch corner or garden bed into a miniature graveyard. Cardboard is useful for lightweight temporary decorations, while foam board or another suitable craft material can create a sturdier version.
Cut each stone with a slightly different silhouette. Rounded tops, uneven edges, and varied heights make the display feel more believable than identical rectangles.
Paint with layers of gray and charcoal, then lightly dry-brush a lighter shade over raised areas for an aged stone effect.
Do / Don’t
| Do | Don’t |
|---|---|
| Vary the shapes and heights | Make every stone identical |
| Use layered gray tones | Paint everything one flat gray |
| Anchor outdoor pieces securely | Leave lightweight pieces loose in windy weather |
| Keep the display away from walkways | Create tripping hazards |
Build a Spiderweb Corner With Cotton Fiber
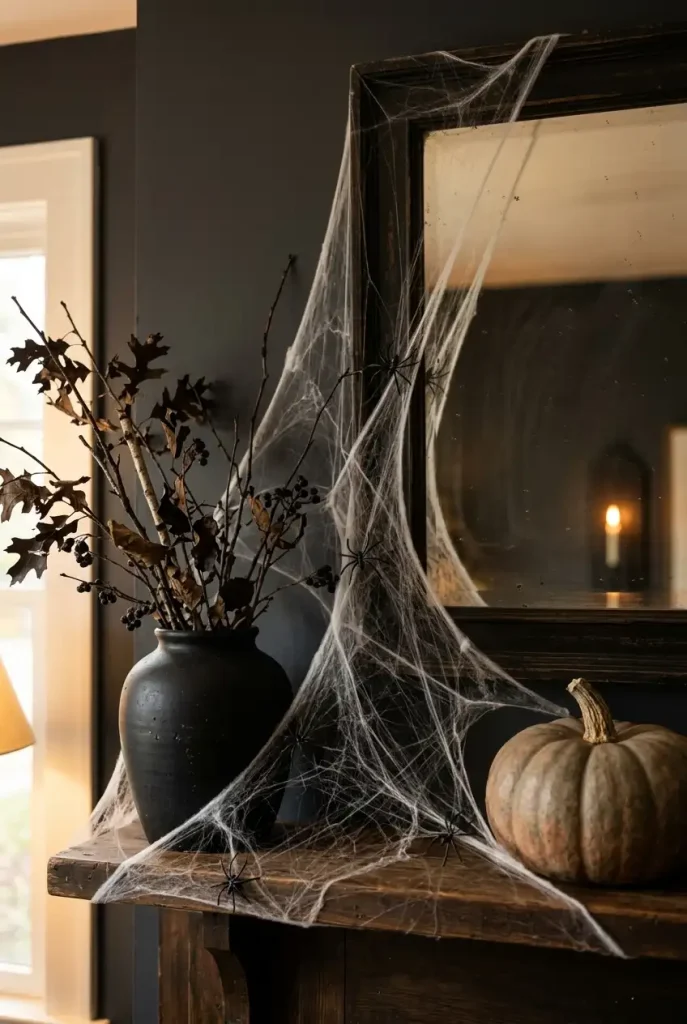
A dramatic spiderweb doesn’t need to cover an entire room. One concentrated corner can have much more visual impact and takes less time to install.
Stretch commercially available decorative spiderweb material across a mirror, stair railing, mantel corner, or sheltered porch feature. Pull individual strands thinner in some places so the web looks irregular rather than like a solid white sheet.
Add a few lightweight artificial spiders as accents, but avoid covering every inch of the web.
Quick Tip: Dark backgrounds make white spiderweb material stand out much more clearly.
Make a Creepy Eye Garland

For a fun Halloween party or family craft session, turn simple paper circles into a creepy eye garland. The idea works particularly well across a mantel, doorway, or snack table.
Cut circles from white cardstock, then layer smaller colored and black circles to create different eye patterns. Add a few eyelids or lashes from black paper if you want a more whimsical look.
String the eyes along twine or ribbon, leaving small spaces between them.
Materials
- White cardstock
- Black cardstock
- Colored paper
- Scissors
- Glue
- Twine or ribbon
- Hole punch
Create a Shadowy Halloween Candle Display

Instead of buying a collection of themed candleholders, transform ordinary glass vessels into a coordinated Halloween display.
Wrap the outside of heat-safe candle vessels with dark paper cutouts or use removable decorative sleeves designed for candleholders. For a safer setup around paper, use battery-operated flameless candles.
Arrange several vessels in different heights on a tray. The contrast between warm candlelight and dark silhouettes creates atmosphere without requiring lots of additional decoration.
Safety Note: Keep real flames away from paper, dried foliage, fabric, and other combustible craft materials. Battery-operated candles are the simpler choice for displays containing handmade paper elements.
Turn Old Frames Into Spooky Gallery Art
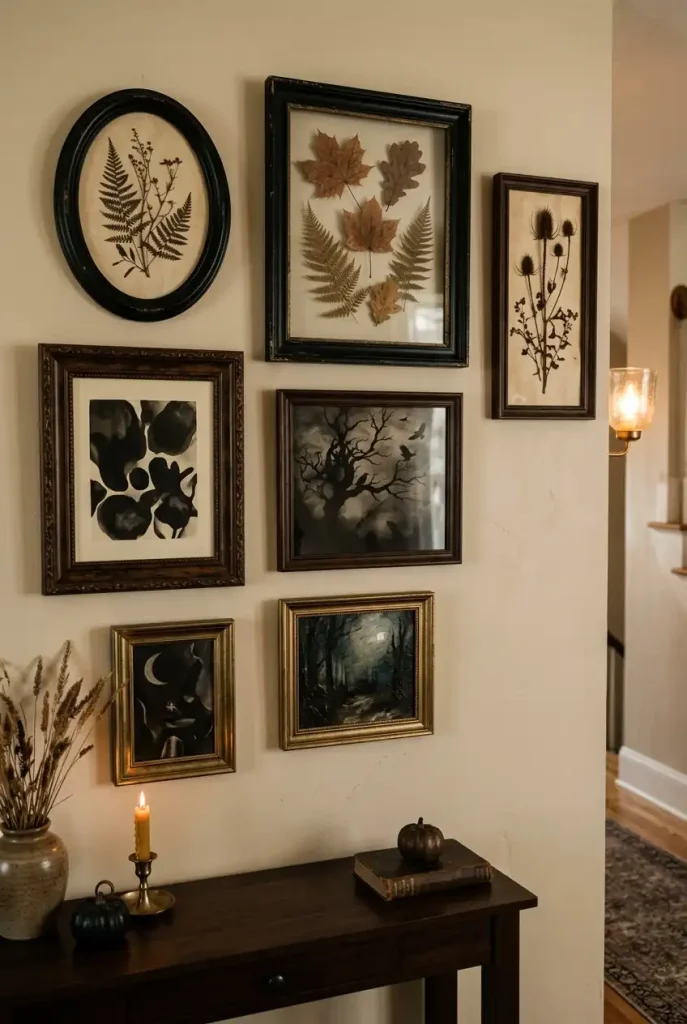
Give thrifted or unused picture frames a Halloween makeover by filling them with handmade silhouettes, pressed-looking botanical shapes, or dark abstract artwork.
A collection of mismatched frames can actually work better than a perfectly coordinated set because the different shapes create the feel of an old collected gallery.
Paint the frames black, leave some wood tones exposed, or use a mixture of finishes for a more aged appearance.
Editor’s Note: The strongest gallery walls usually have one visual anchor. Make one frame noticeably larger or give it the darkest artwork so the arrangement doesn’t become visually flat.
Make a Black Lace Pumpkin Centerpiece
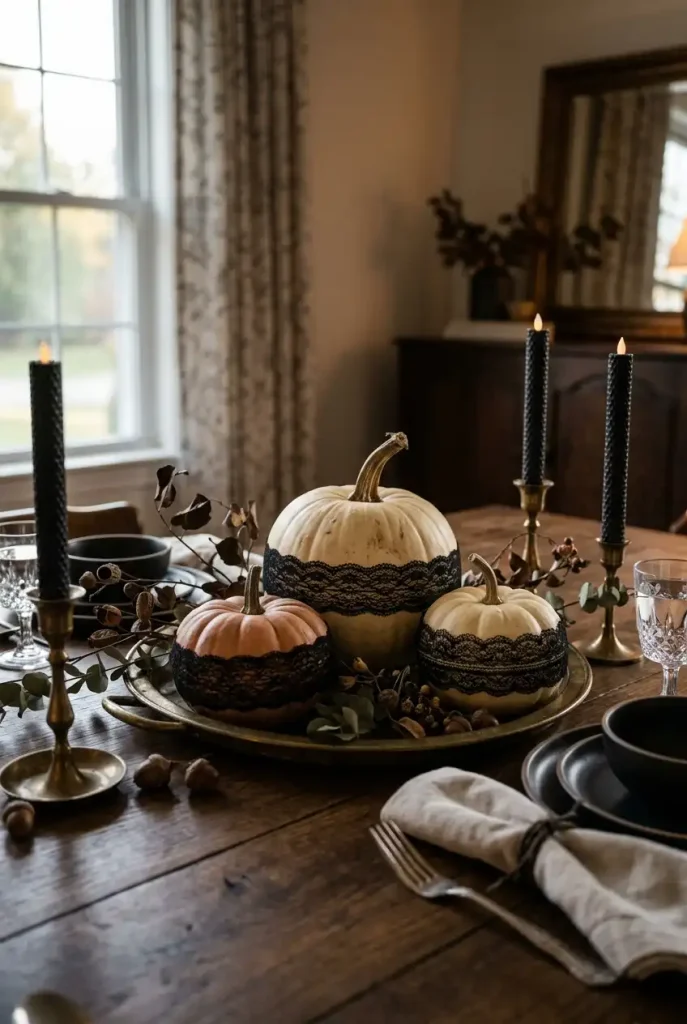
For a Halloween look that feels more elegant than playful, decorate plain pumpkins with black lace. White, cream, or muted orange pumpkins provide a useful contrast against the dark fabric.
Use removable adhesive where appropriate or choose lace bands that can be wrapped around the pumpkin without permanently attaching them. Combine several pumpkins of different sizes in a shallow bowl or tray.
This works especially well on a dining table because the decoration stays relatively low and doesn’t interfere with conversation.
Quick Tip
Use one lace pattern as the dominant texture and keep the remaining table décor simple. Too many competing patterns can make the centerpiece feel busy.
Craft a Hanging Ghost Trio
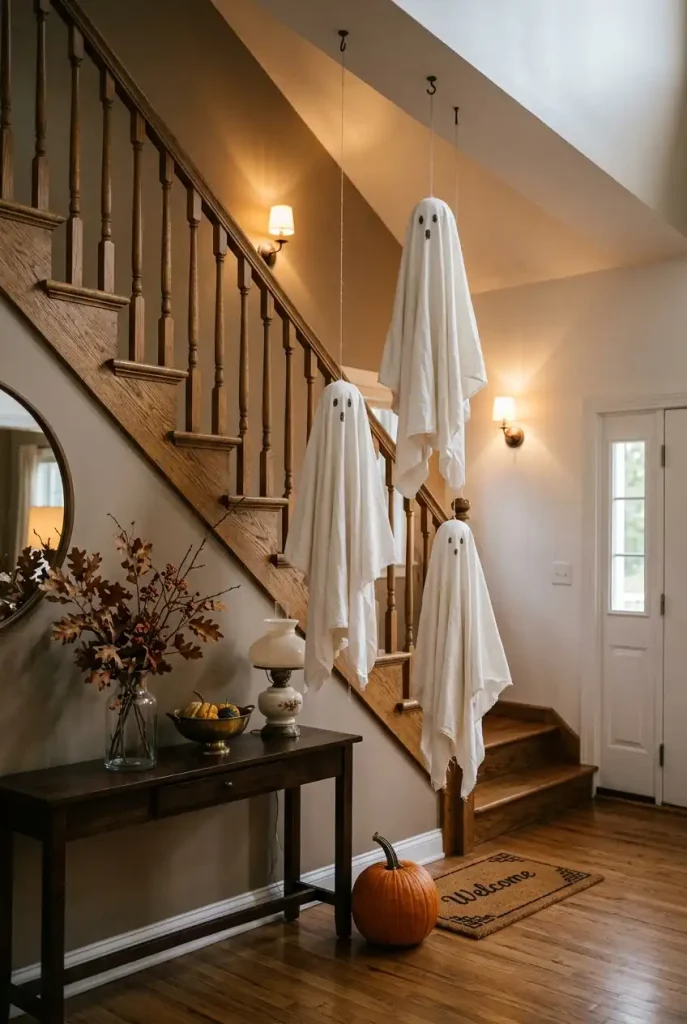
A trio of lightweight hanging ghosts can add movement to a staircase, covered porch, or large entryway. White fabric gives the project a softer appearance than plastic decorations, while the silhouettes become more dramatic in low evening light.
Use lightweight fabric and secure the hanging point carefully. Keep the ghosts away from ceiling fans, heating equipment, light fixtures, and areas where people could walk into them.
For a more polished look, vary the ghost heights rather than hanging all three at the same level.
Materials
- Lightweight white fabric
- Small lightweight forms for shaping
- String or clear hanging line
- Black paper or removable details for faces, if desired
- Scissors
Make Potion Bottles From Thrifted Glassware

Old glass bottles, small vases, and unusual thrift-store containers can become a collection of fictional potion bottles for a Halloween shelf.
The visual effect comes from grouping different shapes rather than trying to make every bottle match. Add corks, dark-colored liquid substitutes, dried herbs, twigs, or other safe decorative fillers.
Avoid storing anything edible or drinkable in decorative bottles that are intended solely for Halloween display.
Do / Don’t
Do: Use interesting bottle shapes and vary the heights.
Don’t: Use unlabeled containers for actual household chemicals or anything that could be mistaken for a consumable product.
Build a Spooky Staircase Garland
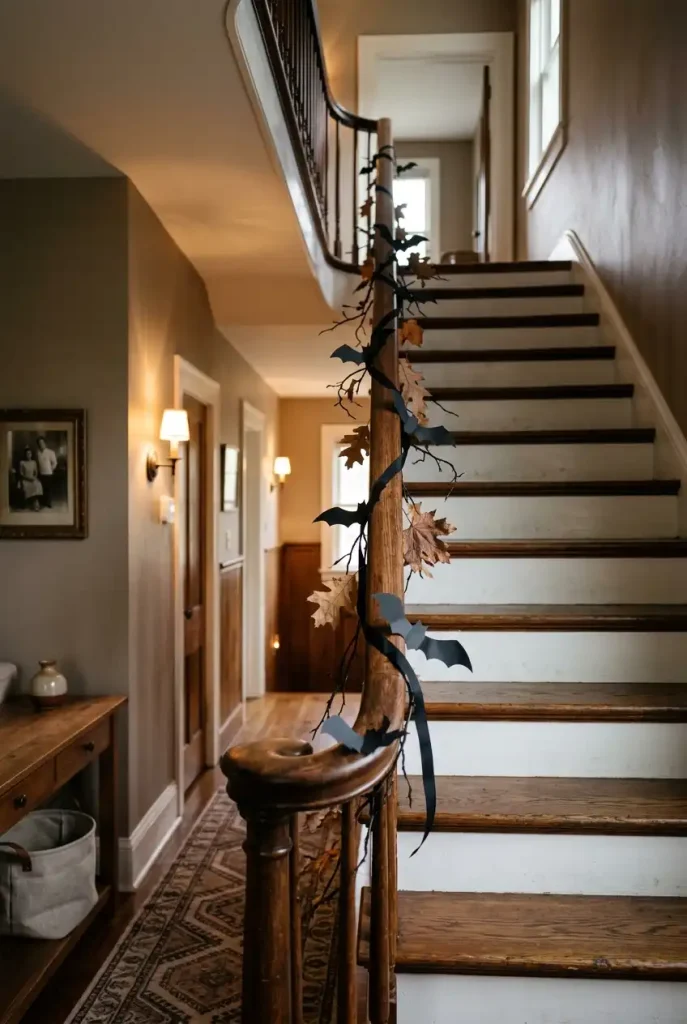
A staircase offers a natural vertical canvas for Halloween decorating. Instead of covering the railing with a bulky garland, combine a narrow dark ribbon with faux branches, paper leaves, small bats, or lightweight fabric accents.
Work from the top downward and secure the arrangement at regular points so it follows the railing rather than hanging unpredictably.
How to Style It
- Start with a narrow dark ribbon or fabric strip.
- Attach lightweight faux branches at selected intervals.
- Add a few paper bats or leaves rather than filling every gap.
- Step back from the staircase and check the overall silhouette.
- Adjust the spacing so the arrangement feels balanced from both the bottom and top of the stairs.
Safety Note: Keep decorative material clear of stair treads and make sure nothing can catch on people’s clothing or feet.
Create a Moon-and-Stars Window Silhouette

A dark paper window silhouette can make a room look especially atmospheric after sunset. Cut simple moons, stars, bare branches, or flying-bird shapes from black cardstock and arrange them near a window.
The daylight version looks graphic and clean, while evening light from inside can create stronger silhouettes from outside.
Use removable attachment methods appropriate for the window surface.
Best For: Bedrooms, children’s craft areas, dining rooms, and front-facing windows where the silhouette can be enjoyed from both sides.
Turn a Mirror Into a Haunted Portrait

Give an ordinary decorative mirror a temporary Halloween personality by framing it with dark fabric, faux cobwebs, dried branches, and a few handmade paper accents.
The mirror itself can remain completely functional, which makes this a useful option for an entryway or hallway where a reflective surface is already part of the décor.
Keep the decoration around the perimeter rather than covering the center.
Common Mistake: Covering too much of the reflective surface.
Better Approach: Let the mirror remain visually recognizable and concentrate the spooky details around the outer frame.
Make a Pumpkin Topiary From Paper Pumpkins
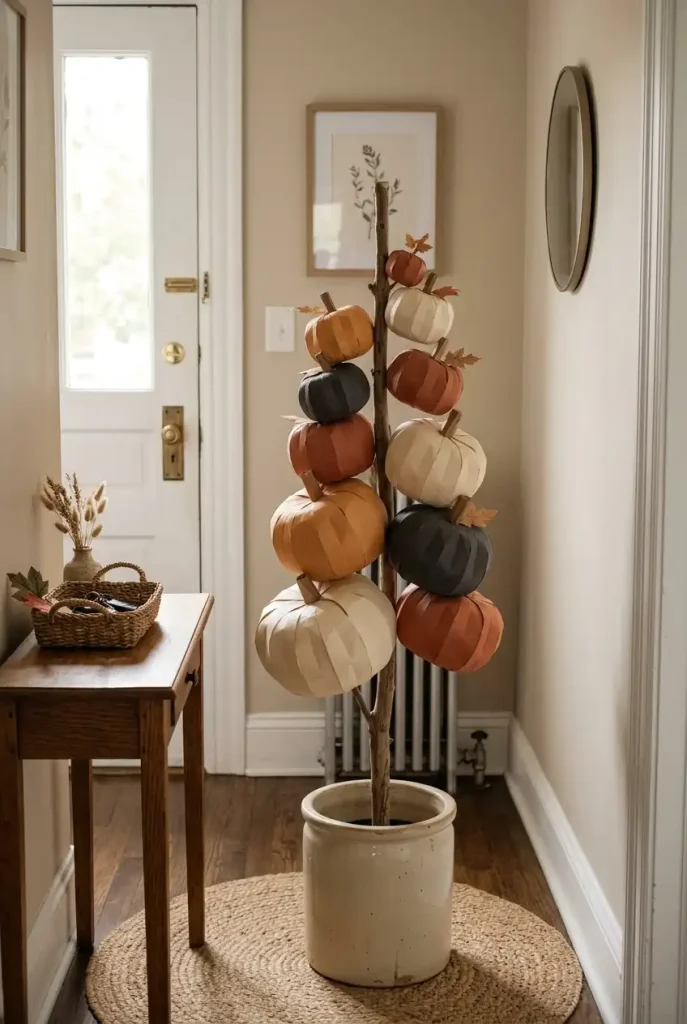
A paper pumpkin topiary can bring Halloween color into a small apartment or entryway without taking up much floor space.
Create several paper pumpkins in complementary shades such as cream, charcoal, muted orange, and deep rust. Stack them visually in a tall container or arrange them around a central branch structure.
The important detail is proportion: the arrangement should feel substantial enough to balance its container without becoming so large that it crowds the entryway.
Editor’s Note
For small spaces, vertical decoration often provides more impact than spreading many small pieces across every available surface. A single tall arrangement can establish the season without making the room feel cluttered.
Craft a Dark Botanical Table Runner

For a Halloween dining room that feels atmospheric without looking like a costume shop, make a simple dark botanical runner.
Use black or charcoal fabric as the base and layer dried leaves, branches, seed pods, and small pumpkins along the center. The arrangement should stay low so guests can see across the table.
A few candles or warm LED lights can add evening atmosphere, while cream-colored dinnerware creates contrast.
Quick Tip
Let portions of the table runner remain visible. Negative space keeps a long centerpiece from becoming visually heavy.
Create a Haunted Entryway With Layered DIY Details

Instead of making one oversized Halloween decoration, combine several of the smaller crafts into a coordinated entryway scene.
Start with one strong focal point—a dark wreath, spooky mirror, or cluster of paper bats. Then add two or three supporting elements such as a small lantern, dried branches, a few pumpkins, or a miniature haunted house.
The goal is layering, not filling every surface.
A Simple Layering Formula
- Background: wreath, mirror, framed art, or paper silhouettes.
- Middle layer: branches, lanterns, or a small seasonal arrangement.
- Foreground: one or two pumpkins, a tray, or a small handmade craft.
- Accent: a single unexpected spooky detail such as a paper bat or miniature ghost.
This approach also makes decorating easier to scale. In a small apartment, use one wall and a narrow console. In a larger home, repeat the same visual language in the entry, living room, and dining area without copying the exact arrangement.
A Simple Way to Pull the Whole Look Together
The easiest Halloween homes to decorate are usually the ones with a clear visual thread. You don’t need every room to contain a different theme. Pick two or three recurring elements—perhaps black paper silhouettes, dried branches, warm candlelight, and cream pumpkins—and repeat them in different ways.
For a more traditional Halloween atmosphere, bring in muted orange and classic black. For a quieter haunted-house look, stay with charcoal, ivory, aged wood, and warm amber lighting. If you’re decorating a rental, prioritize removable wall attachments, tabletop arrangements, fabric accents, and temporary window silhouettes rather than permanent changes.
Most importantly, leave some empty space. Handmade decorations have more impact when each piece has room to be noticed.